Sunday, November 25, 2012

EN 459-1:2010 European Standard for Building Lime


Monsieur Louis Vicat
Europe has a continuous, documented history of building with lime dating from the Roman Republic, a period of well over 2,000 years. The above referenced standard is the UK implementation of the European Committee for Standardization (CEN) Cement and Building Lime Technical Committee 51. The European Committee for Standardization is an international non-profit providing a similar function to the American Society for Testing and Materials. The standard is a comprehensive document for defining and distinguishing manufactured limes used in construction. Parts 2 and 3 of the standard refer to Testing Methods and Conformity Evaluation respectively.

Whereas lime enjoyed only a brief history of widespread use being largely displaced by Portland cement in the US, in Europe the tradition is maintained and is inclusive of a wide range of limes. This post is a follow up on a previous article on Natural Hydraulic Limes. Hopefully it will serve to dispel some of the mystery and confusion surrounding the classification of NHL’s and highlight the balanced rationale based on experience, science and practical use reflected in the European standard.

Louis Vicat

In our previous article we briefly discussed the long history of hydraulic limes from Roman times, through the Renaissance and culminating in a scientific understanding in the early 19th century. Frenchman Louis Vicat began his career as an engineer conducting research into limes used for hydraulic works. Although hydraulic lime works had been already been underway since the mid-18th century Vicat was the first to consolidate the research and publish a comprehensive paper in 1818. Ten years later he would revise and expand upon his original work, publishing Résumé des Connaissances Positives Actuelles sur les Qualités, le Choix et la Convenance Reciproque des Matériaux Propres et la Fabrication des Mortiers et Ciments Calcaires, mercifully abbreviated to Mortars and Cements in Captain John Thomas Smith’s 1837 English translation.

Vicat’s testing procedures and classification index was to be the standard until recent times. The principles they were based on still are. His determination for classification was primarily twofold. The first was the chemical composition and percentage of argillaceous (clayey) infiltration in the given limestone under test. Second, was the reactivity and hydraulicity of the quicklime produced from said limestone. A summary of typical characteristics with approximate ranges for which Vicat himself acknowledged and documented exceptions to strict classification:

Rich limes
Containing less than 6% of inert impurities
Very reactive with a swelling during slaking exceeding 2 times in volume
No set with water

Lean or poor limes
Containing less than 30% of inert impurities
Significantly less reactive with minimal swelling during slaking
No set with water

Feebly hydraulic limes
Containing less than 12% of active* impurities
Reactive with minimal swelling during slaking
Set in 15 to 20 days

Moderately hydraulic limes
Containing less than 18% of active* impurities
Significantly less reactive with minimal swelling during slaking
Set in 6 to 8 days

Eminently hydraulic limes
Containing less than 25% of active* impurities
Almost unreactive with little to no swelling during slaking
Set in 2 to 4 days
*Vicat does explain that by active he is referring to silica not alumina

Vicat’s developed a precise method so he could consistently define when his tested limes achieved a set. However, he also furnishes his readers with a useful explanation that a “set” approximately corresponded to the hardness reached when the mean or average pressure exerted by the arm would resist an impression by the fingertip. I appreciated reading his book that he always provides both scientific, laboratory methods and results as well as practical tests that would be useful in the field for prospectors or workmen.

EN 459-1:2010

Despite our focus in this post on NHL’s, I will say the EU standard provides useful information for a broader range of building limes. For example, there are concise definitions for quicklime and hydrated limes, high calcium and dolmitic limes with impurity percentile categorizations roughly corresponding to Vicat’s rich, lean and poor classifications. Also, there are additional classifications for “Formulated” and “Hydraulic” limes that have additions of pozzolans, fillers, cements, fly ash etc.

Natural Hydraulic Limes fall under three classifications: NHL 2, NHL 3.5 and NHL 5. Not unlike Vicat the classification is based primarily on two factors: chemistry and set. However, the calculations are arrived at differently and I would argue more useful for construction.

NHL 2
Available hydrated lime, Ca(OH)2 ≥ 35%
Compressive strength at 28 days, ≥ 2 to ≤ 7 MPa*
*A megaPascal (MPa) or Newton (N/mm2) is a metric unit of pressure roughly corresponding to 145 psi

NHL 3.5
Available hydrated lime, Ca(OH)2 ≥ 25%
Compressive strength at 28 days, ≥ 3,5 to ≤ 10 MPa

NHL 5
Available hydrated lime, Ca(OH)2 ≥ 15%
Compressive strength at 28 days, ≥ 5 to ≤ 15 MPa

Courtesy of Lafarge Natural Hydraulic Limes


How do the NHL classifications compare with Vicat’s? The chemical requirements are a bit different. Vicat’s tests were based on setting underwater whereas the NHL testing is determined by compressive strength. So we can say they don’t compare exactly. 

Nevertheless, at least in regard to compressive strength, an average NHL 2 generally corresponds and tests within range of what Vicat had classified as Moderately hydraulic limes. NHL 3.5 overlaps between the stronger Moderately and weaker Eminently hydraulic limes. An average NHL 5 corresponds to the stronger Eminently hydraulic limes and stronger NHL 5’s exhibit compressive strengths corresponding to what Vicat might have classified as a Natural cement. Although there are other requirements under the NHL designation such as water demand and retention, bulk density, whiteness etc. this does provide an overview of how the two classifications bear some relationship to one another.

Practical Implications

Why the broad range of allowable compressive strengths for each NHL classification? I’ve yet to read any published documentation addressing this question; however, there appears a general consensus among those involved in manufacturing. Testing requirements for manufacturers as prescribed by EN 459-2:2010 are designed to achieve optimal compressive strengths under laboratory conditions. The mortar has a proportion of one part freshly baked NHL to 3 parts of specified sand by weight (approx. 1:1 by volume). Only enough water is added to the mix to vibrate and compress. 

Lafarge NHL 3.5
Typical field use NHL to sand ratios from 1:1.5 to 1:3 by volume, additional water (unpurified) for workability, lack of vibration/compression are just some of the factors that make it highly unlikely anything near a manufacturer’s published compressive strengths will be achieved in the field at 28 days. The various designated manufacturing requirements of NHL 2, 3.5 and 5 refer to minimum compressive strength requirements in MPa under lab conditions to ensure that mortars reach a practical compressive strength in the field. For sensitive restoration work it is best practice to perform tests on actual mortars under consideration for use in the field rather than rely exclusively on a published manufacturer’s compressive strength.

Average compressive strengths of the classification are as follows:
NHL 2 – 4.5 MPa
NHL 3.5 – 6.75 MPa
NHL 5 – 10 MPa

A significant requirement of the NHL classification is that almost no additions are allowed. The single exception is 0.1% of a grinding agent helpful in the manufacturing process. Two important components result from the baking and subsequent slaking of limestone utilized for NHL: hydrated lime, Ca(OH)2 and belite, a dicalcium silicate that forms in the baking process. The belite is the component responsible for the hydraulicity of the NHL. During the baking some of the belite agglomerates forming small pebbles. Manufacturers often retain these in the screening process. Manufacturers are permitted to grind these and add them back into the NHL to increase the hydraulicity. This is not considered an addition as it is a component of the original limestone. This is how some manufacturers are able to produce multiple NHL designations from a single limestone source.

There is some controversy over whether it is acceptable practice for an engineer or craftsman to add hydrated or putty lime to lower the compressive strength of NHL mortars in the field. As shown above hydrated lime is already a main component of NHL so there is no fundamental incompatibility. Extensive testing of the effect of high calcium hydrated lime mortars in NHL mortars have been conducted in the UK and results published in Hydraulic Lime Mortar for Stone, Brick and Block Masonry. Estimates for reduction in compressive strength from the addition of lime putty are more difficult to predict as factors such as length of slaking and water content can vary results considerably. 

Historically, pozzolans such as microsilicas  have been added for the occasional need to increase compressive strength, accelerate the set or otherwise alter the properties of NHL mortars. It would be advisable to consult with an expert in the potential long term effects of any such additions.


Contributed by Patrick Webb

Saturday, November 24, 2012

An American Couple’s Perspective on French Wine and Plaster Traditions: Viticulture


Château de Chambert
Nature. Culture. Perhaps these seemingly disparate aesthetics were no better reconciled than by the French Renaissance tradition of the formal garden.

“In the Renaissance taste the garden was an extension of the main design. It was a middle term between architecture and Nature. The transition from house to landscape was logically effected by combining at this point formality of design with naturalness of material.” – Geoffrey Scott, The Architecture of Humanism

To this point we have considered Varietals and Terroir…learning about grapes and minerals…exploring soils, weather and geology…recognizing all of nature’s generous contributions. All that we have hitherto discussed is most fundamental; however, wine and plaster are uniquely products of culture. The balance of our five part series will consider the human touch.

Viticulture in Wine

Although located in what is considered the “old world” of wine production, Bordeaux is squarely in the forefront with regard to wine-making technology.  So in this segment we are going to discuss an aspect of the Bordeaux wine industry that receives nowhere near the attention it deserves. We are talking about viticulture. Viti is latin for vine therefore viticulture roughly translates to vine cultivation.  In this article, we will examine two methods of viticulture that are essential to making a great wine; vine manipulation and pest control.

Vine leaves contain chlorophyll cells that absorb sunlight enabling the plant to extract carbon dioxide from the air and convert it to sugar. The nutrients imparted by the sugar feeds the vine roots, grape clusters and leaves ensuring the entire plant receives exactly what it needs, when it is needed.

Allowing too much foliage shields the grapes from the sunlight they need for the last stage of their healthy development, so pruning is crucial to producing a quality wine. However caution must be exercised with cutting, because every cut is an entry point for pests to enter and attack the vine.  On the other hand, if too many leaves are pruned, the plant does not have the means to absorb sufficient sunlight to sustain the entire vine.

Wine grapes emerge at the end of the growing season so the plant’s nutrients must further be shared with the new grape clusters. If there are too many clusters, the sugar and acid levels will likely be undeveloped and/or unbalanced resulting in a poor showing as a wine.  Too few clusters negatively affects potential profits from wine sales.

Pest control is another very important aspect of viticulture. In the 1870s a small, deadly phylloxera louse made it’s way to Europe and all but wiped out all wine production. Phylloxera destroys the grapes, rots the vines and often leaves its larvae in the root, eventually killing the vine completely.  Although Bordeaux and Europe at large have regained their wine producing capabilities, phylloxera and other lice, along with viruses, bacteria, fungi, mites and insects are still among the many threats to healthy vines.

In an effort to eliminate ongoing threats to their vineyards and livelihoods, many late 20th century wine growers often used chemical fertilizers and pesticides indiscriminately.  Thankfully much has changed since then with most of the region’s winegrowers using more environmentally conscious, natural pest control methods.  For example, Bordeaux wine growers are currently and constantly experimenting with root grafting in order to find the genetic combination that is naturally resistant to harmful bacteria and viruses.  Scientists and wine growers are also experimenting with sea algae as a natural deterrent to gray rot. 

There is no doubt that viticulture is both science and art.  Winemakers must have intimate knowledge of their vineyard’s terroir as well as which viticulture methods will work best within its parameters. It is with this intricate knowledge and dedication to quality that winemakers are able to extract the best wines from the best grapes.

Viticulture in Plaster

France is a geologically, minerally rich country. Correspondingly rich in culture, the French have been very successful in exercising their influence over a number of raw mineral materials to produce some of the finest plasters in the world. The plaster equivalent to Viticulture is baking. Let’s now take a closer look at how 3 minerals are prepared for our blended plaster, Terre de Séléné.

Clay is the primary mineral used for plaster in Terre de Séléné. It is an abundant mineral worldwide, the result of millions of years of erosion. In parts of France a relatively pure form is available just under the topsoil, just a few feet below ground. It is easy to excavate and is still traditionally dried by the sun. Later, with minimal effort, it is ground into a powder ready to be used for plaster. While there are a variety of clays in France, clay with a low shrink-swell capacity such as Kaolinite is desirable for Terre de Séléné.

Historically, the French were enamored with this type of clay for additional uses. The word “Kaolin” comes to us directly from French. They in turn inherited the term from China. In the early 18th century the French were obtaining an extremely pure form of clay useful for porcelain, “China”, from a deposit near a mountain the Chinese called Kao “high”, Ling “hill”.

Gypsum is the secondary mineral used in Terre de Séléné plaster. Gypsum is plentiful in France and particularly so in Paris. Gypsum plaster is almost synonymous with the expression “Plaster of Paris”. Paris in fact sits on a “massif” or deposit of mineral gypsum that is among the largest and finest in quality on earth. Naturally occurring gypsum is a type of salt that precipitates through cycles of evaporation from lime or other calcium compounds, typically in lagoons or inland seas.

Preparing gypsum plaster requires a little more effort and energy than clay. It is usually mined from underground deposits. Relatively soft as a stone, it is easily pulverized to a coarse sand ideal for baking. Most of the gypsum plaster useful for Terre de Séléné only needs to be baked at under 350° F for less than an hour. In general, considerable influence can be exercised in the baking process. Adjustments to the grind, temperature, length of baking and even barometric pressure can produce an amazing range of properties in gypsum plaster such as fast setting plasters good for casting or extremely dense, hard plasters appropriate for floors or countertops.

Limestone is the third mineral used for our plaster blend. In abundance in the South of France, limestone is a sedimentary stone, the result of millions of years of marine skeletons accumulating on ancient sea beds. The lime most useful for Terre de Séléné plaster is very pure, having little contamination from magnesium or silicates. By itself, limestone is very useful as a building material; however, to produce a plaster requires considerable fuel and labor.

Limestone is found underground but is plentiful and easier to extract from surface mines. Much harder than gypsum or clay, extraction is laborious. For baking limestone is broken into golf ball size pieces. Traditionally, it was baked for 24 hours in vertical kilns at an extremely high temperature of 1500° F. Modern production methods utilizing crushers and horizontal kilns have reduced the time considerably.

The resulting “quick” lime is highly caustic, potentially hazardous to handle. At this point of production enough water is introduced to cause a partial reaction that reduces reactivity and danger. The slaked lime, also known as dry hydrate, is now ready to be blended with the clay and gypsum plaster to make Terre de Séléné.

As you have read, the French traditions of Viticulture and plaster preparation are very sophisticated. The usefulness of our modern scientific, chemical understanding still lags behind the practical experience gained through centuries of empirical observation and practice. This is especially evident in our subsequent, fourth segment considering the art of the blend, Viniculture.

This article was coauthored by Angela and Patrick Webb

Friday, October 12, 2012

Natural Hydraulic Lime


Traditional French NHL stucco, mortar
As we considered in a previous post, lime is perhaps the most prized and exceedingly versatile building material of the modern world. Early civilizations such as the Egyptians, Greeks and Romans used lime extensively. Many of their works in lime have survived to the present day testifying to its durability and intrinsic beauty.

Today, lime is processed into plasters, stucco coatings, paints, mortars and cements. Chemically defined, pure limestone is a carbonate of calcium or calcite having the formula CaCO3. However, there exist several categories of impure limes (dolmitic, magnesium, natural cement i.e.). The subject of our post today focuses on one of these: natural hydraulic lime or NHL. As we shall discover, sometimes impurities result in interesting and very useful properties.

Hydraulicity

What makes a lime “hydraulic”? As you might guess it has to do with water. Perhaps we can start by considering a non-hydraulic example, pure lime*. When water is added to pure lime it forms a putty. As long as the mix is kept covered the lime will stay in a putty state. Pure lime only reacts chemically when exposed to air, reabsorbing carbon dioxide and returning to its original state of calcite, CaCO3.
Hydraulic materials however, exhibit a chemical change with water or in the presence of water. Moulding plaster and Portland cement are common examples of hydraulic materials. NHL’s mixed with water quickly transform from a putty to a hardened state, even underwater.

Geology

Where do hydraulic limes come from? Limestone is a sedimentary rock that forms from skeletons of marine creatures that have accumulated on the sea floor. With time and pressure these skeletons are pressed together in beds of stone. Nevertheless, limestone remains relatively porous and under certain geologic conditions impurities can leach into or infiltrate the stone over time. A valued impurity for NHL is silica.
Common silica’s like quartz are very prevalent, highly crystalline and non-reactive. Amorphous, chemically active silica’s on the other hand don’t tend to last very long in nature because they are very reactive, especially with lime. The most useful limestones for producing NHL’s have a high amorphous silica content. These limestones are cooked a little hotter than pure limestone, approximately 1100 to 1200 °C, to drive off the carbon dioxide. Once the carbon dioxide is driven off the lime is available to react with the amorphous silica, just add water!

History

Tadelakt objets d'arte, Marrakech souk
The Romans were famous for their great works of architecture. They were the first to have a level of understanding and to make widespread use of hydraulic limes for ports, aqueducts and monumental architecture. Many of these works were accomplished with additions to lime to make them hydraulic. Pozzolanic lime is a subject we will consider in a future post. However, there is also evidence to support that the Romans exploited limestone deposits in the province of Gaul, modern day Languedoc and Provence regions of France, which produced limes that were inherently hydraulic without additions.

Eddystone Lighthouse, 1756
The Romans brought their lime technology in the conquest of North Africa. The tradition of using natural hydraulic limes continued for water cisterns, stucco and objets d’arte. During the Renaissance Palladio makes mention of hydraulic limes in his architectural treatise. By the 18th century English and French engineers were hard at work identifying quality mineral deposits and exploiting them for public works. Advances in modern chemistry led to the 1807 discovery that lime was not an element but an oxide of calcium. With this knowledge established, French engineer Louis Vicat conducted an exhaustive study and published a landmark, comprehensive paper in 1818 classifying limes on the basis of hydraulicity and compressive strength.

Contemporary Use

With the advent of Portland cement in the 19th century, NHL production decreased dramatically. The faster set, harder compressive strengths and impermeability of Portland cement were considered superior qualities that allowed buildings to be constructed faster and cheaper. However, with the passage of time and a large inventory of buildings using both materials, advantages of NHL have become clear and production is once again on the increase.

The lower compressive strength of NHL is now appreciated as a good quality for mortar and stucco. The flexibility of natural hydraulic lime reduces cracking, allowing wall assemblies often to bend rather than break when subject to typical settling over time. The increased porosity of NHL stuccoes facilitates water that penetrates the coating to readily escape through the surface. This same porosity is also of great benefit to masonry work permitting soluble salts to slowly deteriorate the mortar (which can be re-pointed), protecting the more valuable brick or stone supports. NHL’s thus preserve many of the benefits of pure lime mortars and stuccoes whilst allowing masonry and stucco work to be conducted at a faster rate and under a greater range of weather conditions.

*Technically there is a chemical reaction of quicklime, CaO, with water to form slaked lime Ca(OH)2.  However, this article refers to the common definition of a hydraulic lime reaction, the formation of calcium silicates.


Contributed by Patrick Webb 

Friday, August 31, 2012

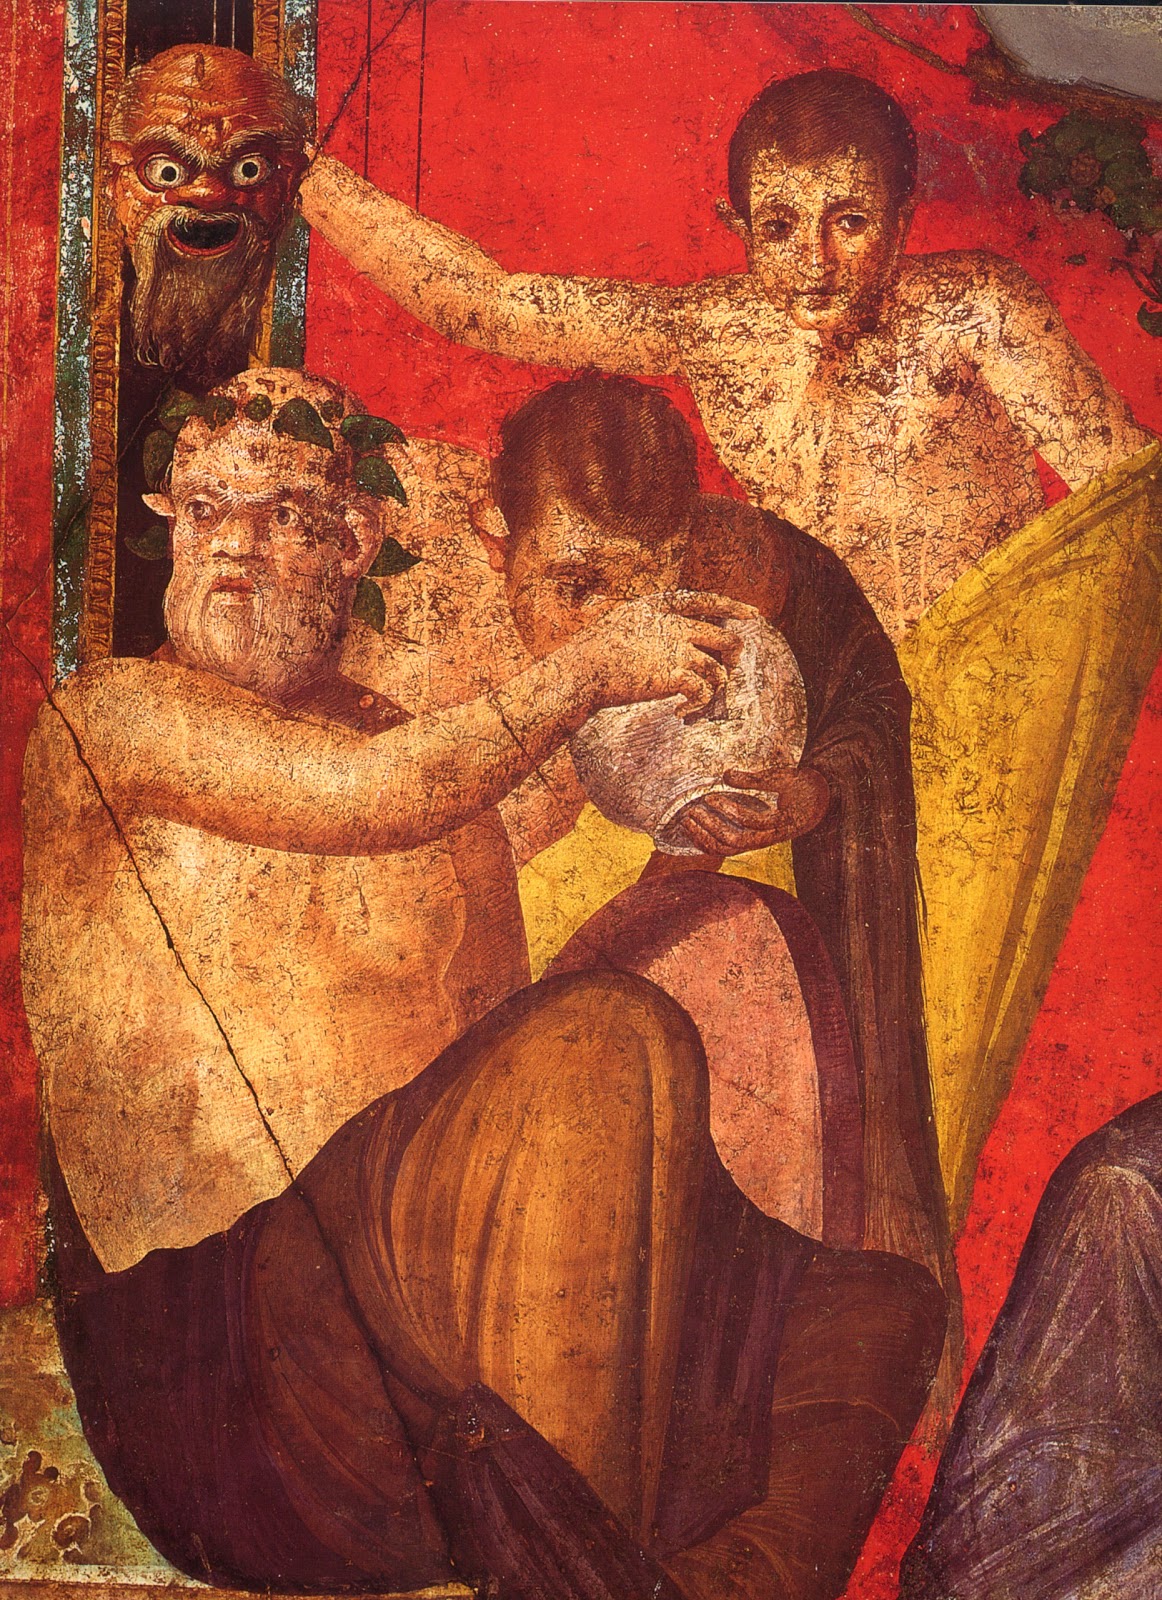
Buon Fresco

Villa dei Mistieri, Pompeii

The Villa dei Misteri, Pompeii. Raphael’s Villa Farnesina. Michaelangelo’s Sistine Chapel.  All are iconic classical and renaissance examples of decorative art closely allied to architecture. The enduring vibrancy of these masterful works of antiquity is attributable in no small measure to the nature of their shared medium: the buon fresco.
True frescoes are the result of painting mineral or oxide pigments into a still moist or “fresh” lime surface. The pigments penetrate into the lime and become integral to the coating as it dries and cures. Protected from the elements a buon fresco can last indefinitely.
History
Support for such a claim can be found at what is thought by many to be the oldest discovered human settlement, Çatalhöyük circa 7500 B.C. Much of what we know of this ancient civilization is preserved in fresco depictions of hunting, husbandry, maps and geometric motifs of apparently purely artistic expression. Subsequent great civilizations such as the Egyptians, the Indus Valley Harappan, Classical Greece & Rome continued to make widespread use of frescoes in their respective cultures.
Our Western cultural heritage of art and architecture has been heavily influenced by ancient Rome. The Romans left behind many well-preserved examples of buon fresco such as those found at Pompeii, Herculaneum and Nero’s palace, the Domus Aurea. Furthermore, we can be very grateful that Roman engineer and architect Marcus Vitruvius Pollio dedicated an entire book in his multi-volume work De Architectura on preparation of supports, lime and pigments for fresco painting along with application guidelines and colorful, opinionated commentary on what he considered the overly decadent aesthetic of his day.
Vitruvius’ writings would experience publication and circulation in the early 15th century at the dawn of the Renaissance. High Renaissance artists such as Rafael, Michelangelo and Leonardo da Vinci would study and expand upon Roman examples to become great masters in their own right. This article serves as an introduction to basic fresco techniques: plastering the grounds and painting of the fresco.
Plastering the Grounds
Interestingly, ancient examples of wall plasters were primarily earthen. In the dry climates of Egypt and the Fertile Crescent, fuel for burning at the high temperature production of lime required was limited. Lime was undoubtedly considered a very precious material and was often only used as a finish coat into which the fresco was painted. In Greece and Rome it became common practice to plaster in lime directly over masonry walls for important works, the Romans sometimes opting for wood lath on ceilings. Fortunately, the principles recorded by Vitruvius were utilized in the Renaissance and still apply today. The basic method to achieve a good ground always entails building up initially with a rough, aggregated coat of plaster, applying subsequently finer sand coats and finishing with a thin, smooth finish coat. The process should maintain enough moisture in the system to give the artist sufficient open time to paint into the finish coat.
Trullisatio. Vitruvius describes in great detail this rough base coat composed of lime, sand, and larger pieces of broken terracotta. A similar function is achieved with what we call a scratch or render coat. It serves as a rough intermediary between the masonry or lath support, providing good mechanical key or adhesion for the following coat.
Aricciato. Vitruvius recommended 3 coats using lime mixed with increasingly finer sands. This directly corresponds to our brown or float coat. Each coat is floated with a wooden trowel to compress and harden the surface. Because lime needs time and moisture to cure each of these coats should be wet down daily and allowed to stand for approximately a week before the next coat. Following the precedent of 15th century architect Leon Battista Alberti, Renaissance and contemporary frescoists have reduced this to one or two coats.
Intonaco. Once again Vitruvius recommended 3 coats using lime this time mixed with increasingly finer marble powders. There is archeological evidence that quality Roman works adhered closely to these advices resulting in total thicknesses of as much as 2 inches. Finish coats varied in the Renaissance as they do today. One Italian contemporary method is to apply a cocciopesto arenato coat (terra cotta sand added to marmorino), compress with a sponge float and immediately apply a finish marmorino. The application firms up in about 2 hours leaving about 6 to 8 hours of working time to paint the fresco.
Painting the Fresco

Following the final coating of plaster, the painter must quickly begin the work of transferring and applying the design before the moisture evaporates from the plaster and locks out the pigments. Working time in buon fresco varies with the humidity of the air and the subsurface, but can generally be assumed to be around 8 hours.
Preparation for painting is key; the design must be understood well, the colors should be prepared and ready for use. Painters of fresco in the past usually had a small crew of assistants to do the plastering, grind and mix colors, and be on hand in case an area had to be redone. It is essential to have done test samples of colors and their tints to judge what they will look like dry, as many colors will change dramatically, especially if they have been mixed with “lime milk”, which goes on clear but dries bright white.
After the plaster has been applied and allowed to slightly set, the first step is transferring the design. Sometimes the design is applied by brush under the final coat of plaster (a sinopia); in other cases it may be scribed into the soft surface or be transferred via a pounce, a drawing that has been pricked with holes to allow charcoal dust to be rubbed through it.

Once the design has been applied, the painter begins to lay in color deliberately and economically, in the manner of watercolor or egg tempera, using the color of the ground as the lightest value, although diluted lime milk may also be used as white and as a mixing tint for colors. The palette for buon fresco is limited to colors that are immune to the chemical severity of lime; several popular colors are not available for fresco, but the palette is nonetheless quite varied, as the ancient murals at Pompeii will attest to. Colors are generally mixed by hand grinding pure pigments with water using a muller and plate, thus pigments that are toxic, such as the cadmium colors, must be used with great caution. There are also newly available pre-mixed colors that can be used, though some purists would reject them. As the plaster dries, the colors are actually drawn down into the surface and a very thin coating of calcium carbonate rises to the top to encapsulate and protect the pigments in a very strong and non-yellowing bond.  Protected from water, the painting of a fresco will last indefinitely. There are techniques for painting after the plaster has dried (called “a secco”) but that will have to be a topic for another day.
Looking to the Future
Traditional frescoes using pure lime as practiced in the Renaissance require a lengthy process taking several weeks due to the necessity of waiting for each layer of lime to cure. A practical alternative is to utilize natural hydraulic lime for the scratch and brown coats. Unlike other setting plasters or cements, natural hydraulic limes do not contain harmful compounds that could later cause efflorescence or otherwise damage the fresco. Natural hydraulic limes achieve a partial cure sufficient to receive a subsequent coat overnight. The entire buildup of grounds can be accomplished in 3 or 4 days at a total thickness of ½”.
Yet another system of grounds being researched for use directly over drywall is a blended mortar of clay, gypsum and lime. Gypsum provides good adhesion whereas the lime and particularly clay components retain moisture for many hours, ideal properties of a base plaster receiving the Intonaco finish and fresco painting.
Conclusion
Intrinsic, enduring beauty has always been a motivational reason to consider buon fresco. However, advances in plaster grounds, safer pigments and reduced expense make the buon fresco not just a whimsical curiosity of the past but a contemporary, vibrant medium accessible to every artist, including you! 
This article was coauthored by Patrick Webb and Steve Shriver